Developed by OARC at UCLA in collaboration with SDSC and TACC
Documentation Home · End Users · App Contributors · Tutorials · Systems · Tenant Admin · Reference
App Contributor Guide
This guide covers packaging a computational tool as a OneSciencePlace (OSP) app so others can run it through the browser. It is the reference companion to the worked App Contributor Tutorials — the tutorials walk through complete end-to-end examples; this guide covers each piece in depth.
On this page
- What an app is
- Creating an application
- Building input elements for the launch form
- UI webform elements reference
- Worked example: adding a webform element
What an app is
An app in OneSciencePlace is a versioned, configured definition of a computational tool that runs on a registered system. Launching an app creates a job that stores its configuration and state. To run a job on a system, you need access to an application. An app encapsulates all the necessary details to execute a job on a system and generate results. Each app is versioned and owned by a designated user who holds special privileges over the application.
What the app definition provides
The app definition provides the information required by the jobs service to:
- Stage input files before running the application.
- Launch the application on the specified system.
- Monitor the application's progress during execution.
- Archive output files after the application completes.
This structure ensures that jobs can be efficiently managed and executed across systems.
Requirements for an app
- All apps must have a singular entry point that takes all arguments.
- Containers must not hard-code host-side ports; use an environment variable or argument instead.
- Containers must not hard-code volume mounts.
- Native graphical apps (for example, MATLAB) must include a VNC server and an option to set a password through an environment variable.
Creating an application
This section walks through each field in the app creation form. The example throughout uses an image classification application running on AWS EC2, but the same procedure applies to any app type and any system.
Reference: the image classification example
The image classify application performs image classification using TensorFlow on AWS EC2. Once you submit a job, image classify handles everything automatically — input files are staged, the classification process is triggered, and results appear in the designated output directory.
To classify an image, pass the image file through the command line using the --image_file argument. To test the application using the Docker image:
docker run --rm osp/img-classify:0.1 \
  --image_file=https://example.com/path/to/image.jpg
This classifies the image at the given URL. If everything works correctly, you should see the classification results as output in the job output directory.
Step 1: Accessing the application creation page
- Log in to your OSP deployment.
Navigate to the Apps menu and click Add app.
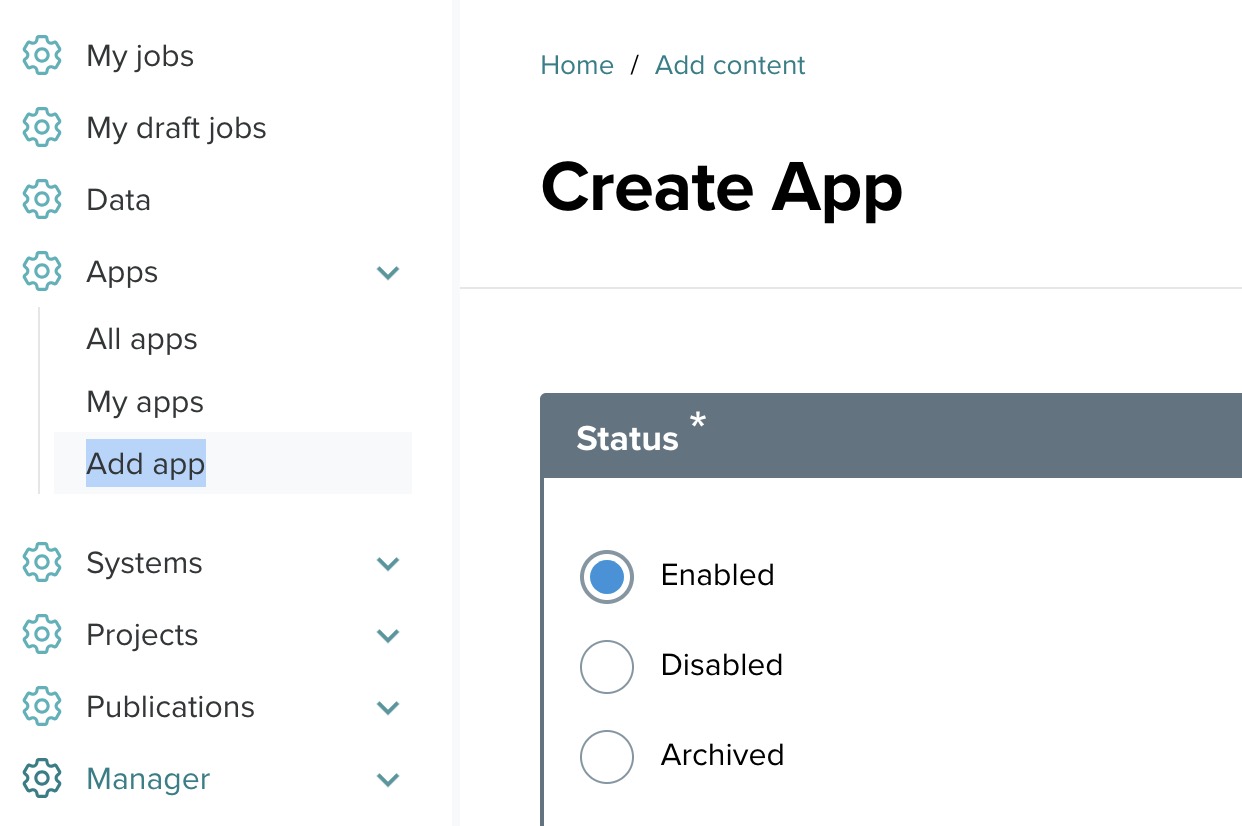
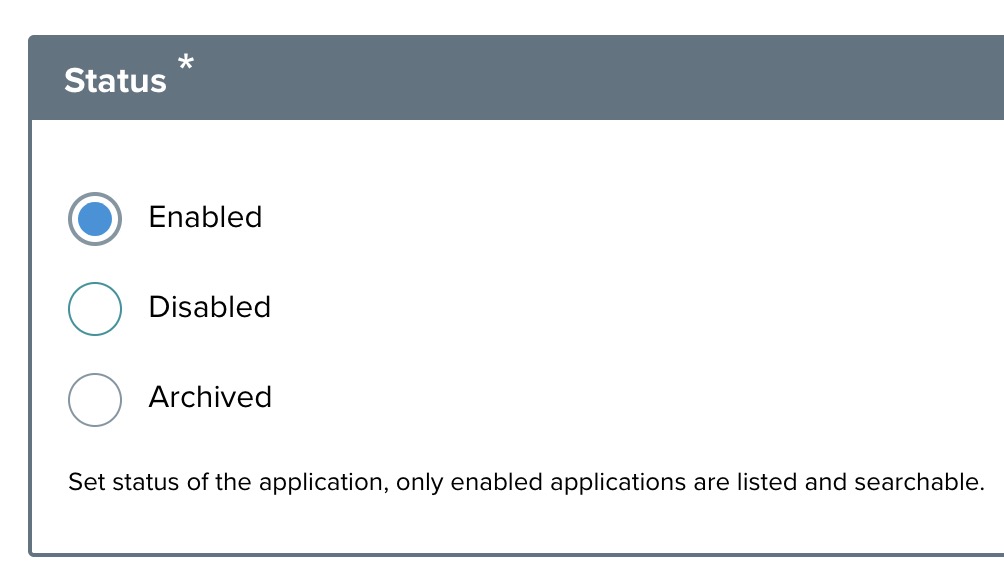
Step 2: Set the status
Under the Status section, you will find three options:
- Enabled — the application is available for use.
- Disabled — the application is hidden from users.
- Archived — the application is archived but its details are retained for future use.
Select the appropriate status for your application.
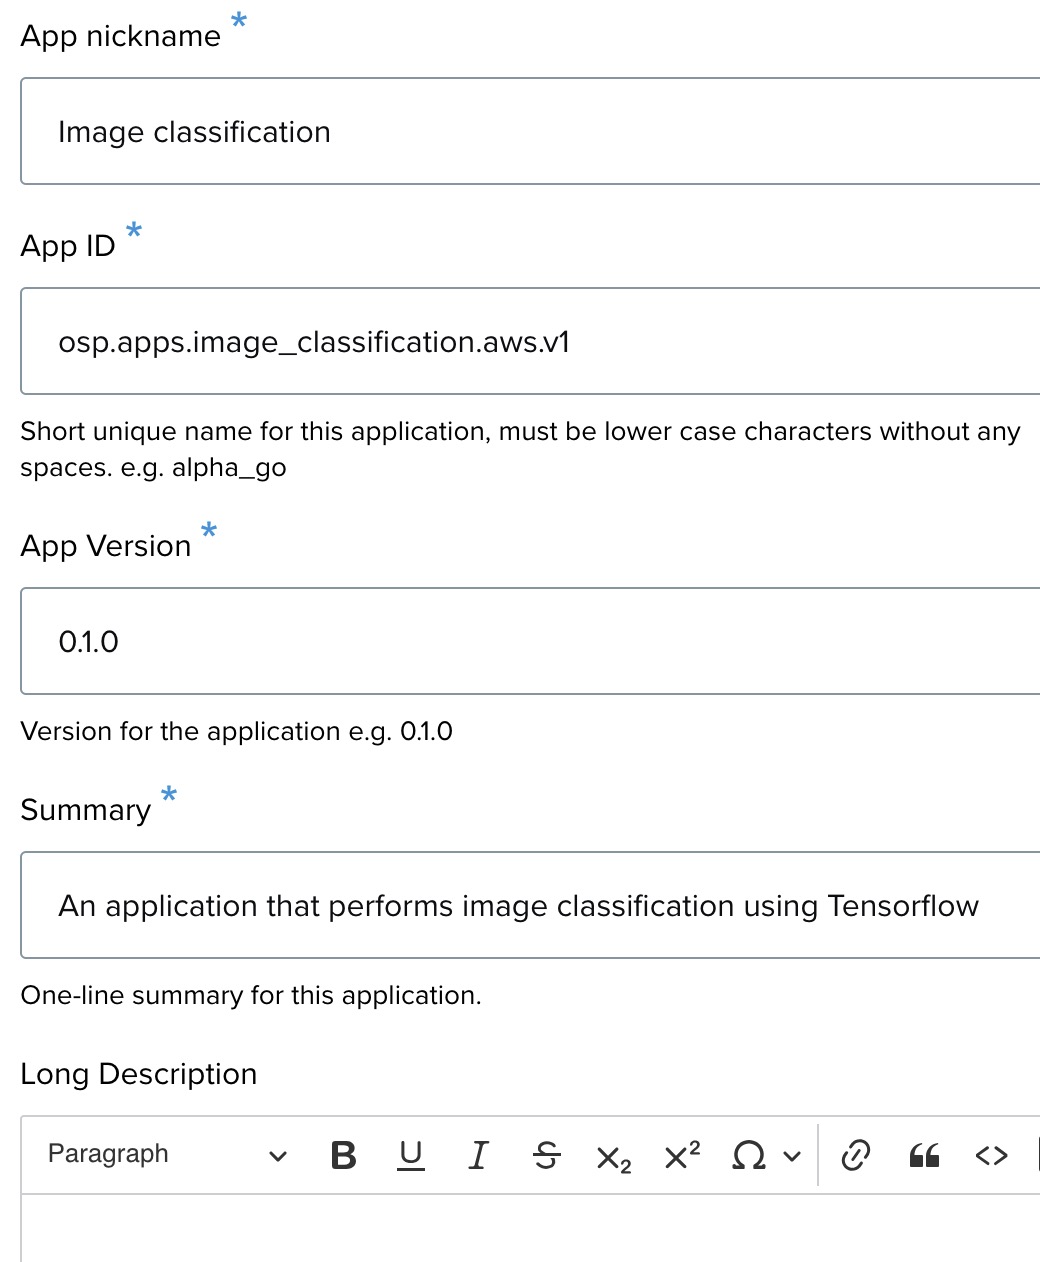
Step 3: Provide app details
- App nickname — a short display name for the application. Required.
- App ID — a unique identifier. Must be lowercase with no spaces. Cannot be changed later. Example:
myuser.apps.image_classification.aws. - App version — a version string. Example:
0.1.0. - Summary — a one-line description of the application.
- Long description — detailed information about the app, entered through a rich text editor.
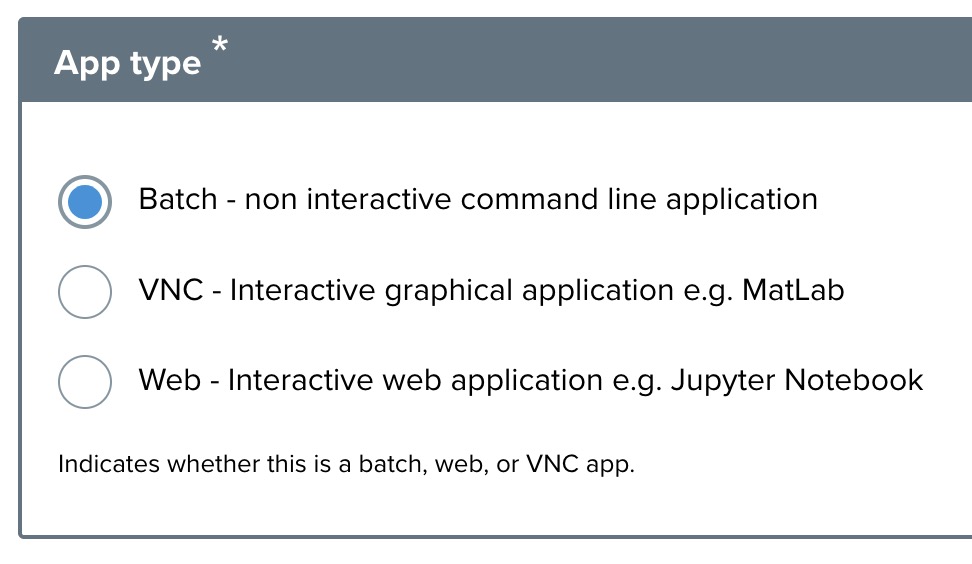
Step 4: Select app type
- Batch — a non-interactive command-line application.
- VNC — an interactive graphical application, such as MATLAB.
- Web — an interactive web application, such as Jupyter Notebook.
Step 5: Miscellaneous settings
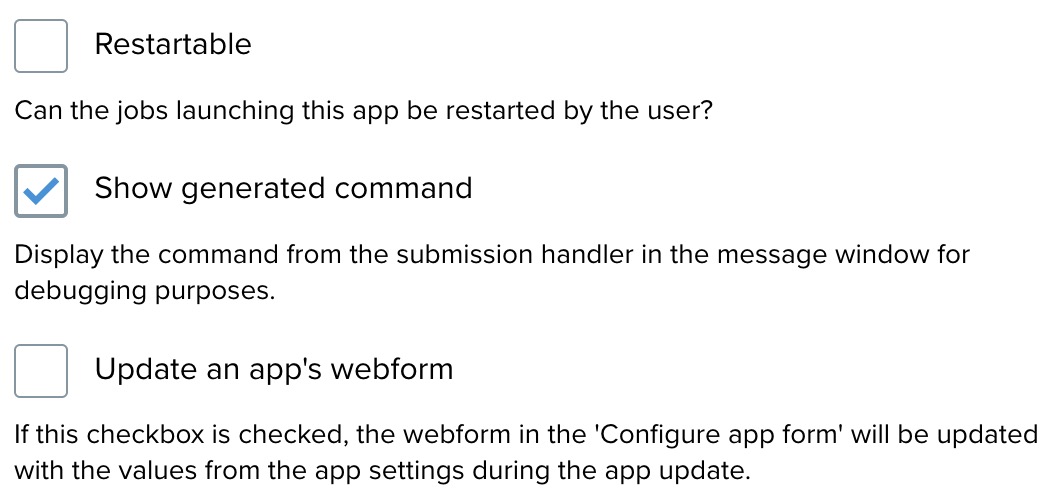
- Restartable — check this if the job can be restarted by the user after submission.
- Show generated command — displays the generated command in the message window for troubleshooting.
- Update the app's webform — if checked, updates the app settings with the values from the form.
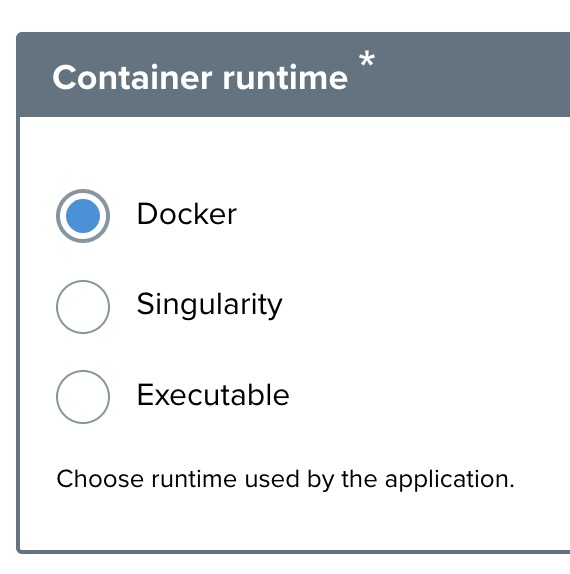
Step 6: Select container runtime
- Docker
- Singularity — when chosen, additional options like Singularity start or Singularity run become available.
- Executable — when chosen, specify the Executable path pointing to the script or binary on the target system.
Step 7: Batch scheduler
Check Use batch scheduler if the app requires a scheduler such as Slurm. If enabled, add a scheduler profile. See the Scheduler profiles and queues section of the System Administrator Guide for details on how scheduler profiles are configured.

Step 8: Container image setup (for Docker or Singularity runtime)
This section defines how your application is packaged and deployed within a container.
Container image URI — specify the exact location or identifier of the container image.
- For a public image, select Public image and enter the full image name. Examples:
ubuntu:latest,tensorflow/tensorflow:2.5.0. - For an uploaded source code archive or pre-built image, this field may be auto-populated or you may receive further instructions on how to reference the image.

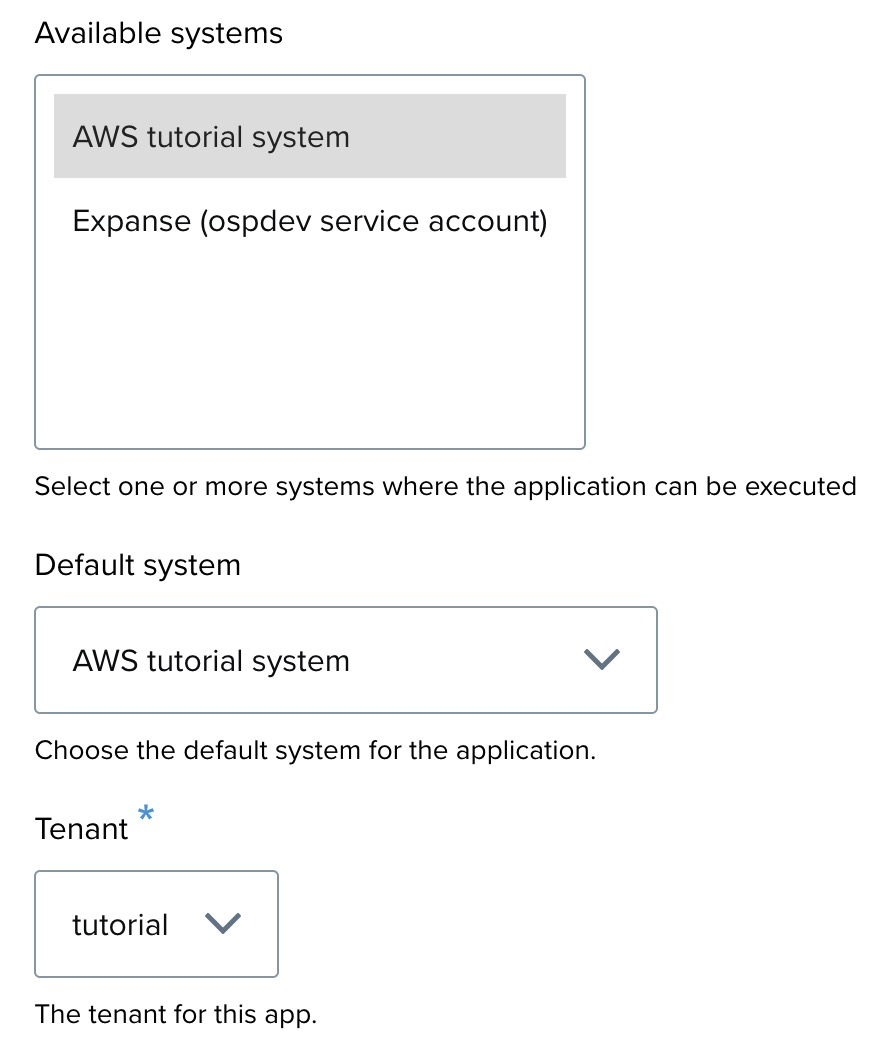
Step 9: System selection
- Available systems — select the system(s) where the app can be executed.
- Default system — choose the default system for the application.
- Tenant — select a tenant from the dropdown.
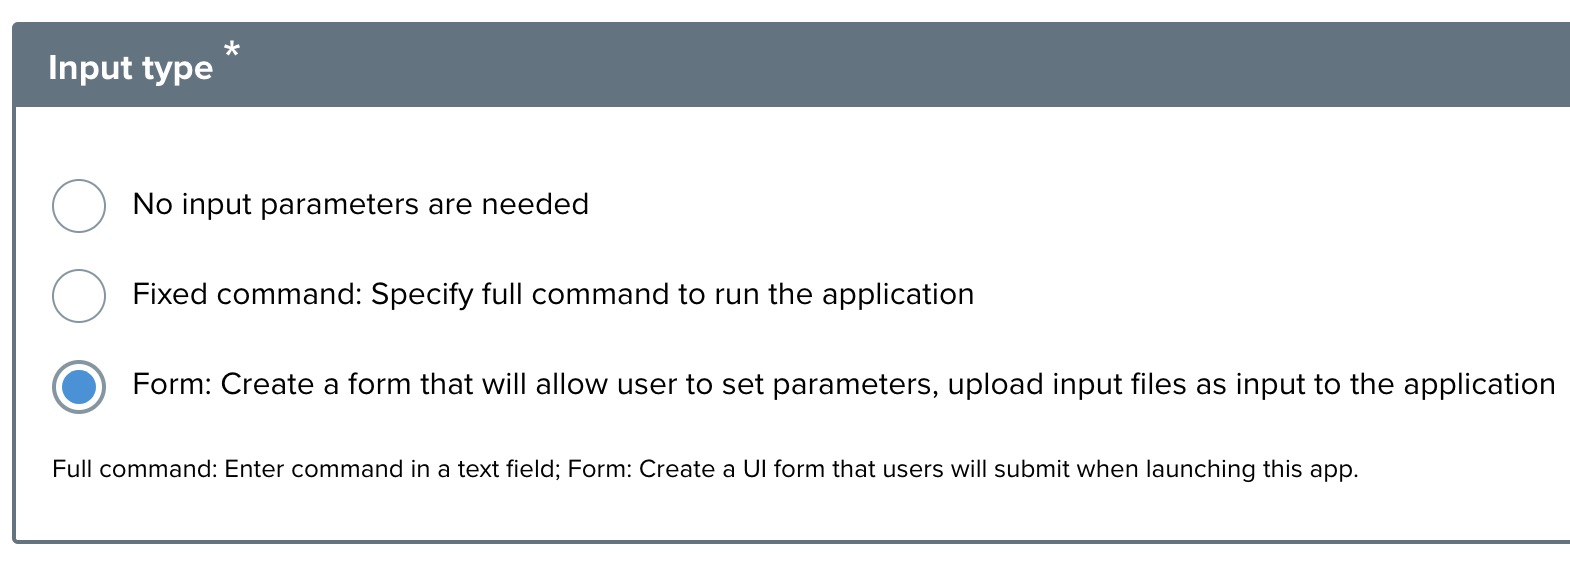
Step 10: Input type configuration
Define how inputs will be provided to the app:
- No input parameters are needed — the application doesn't require any user-provided input.
- Fixed command — specify the full command to run the application. You enter the complete command in the text field that appears.
- Form — create a form that allows users to set parameters and upload files as input. Select this to build a user interface with the form builder covered in the next section.
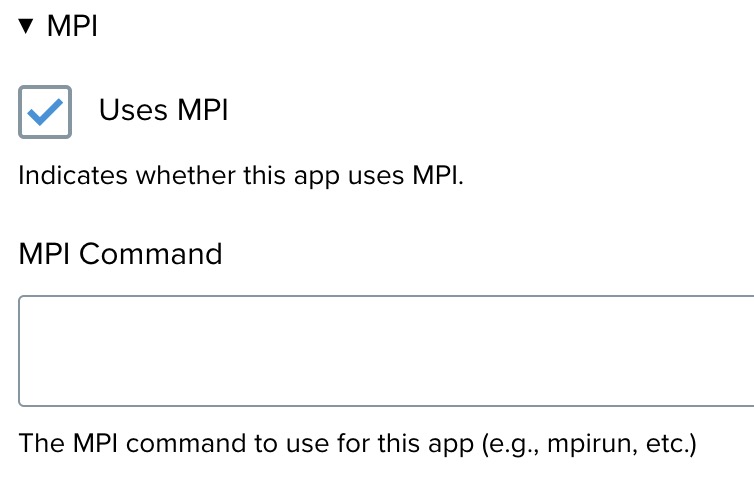
Step 11: MPI setting
- Uses MPI — check this if your application uses MPI for parallel processing across multiple nodes or cores.
- MPI Command — if MPI is enabled, specify the command used to launch your application (for example,
mpirun,srun).
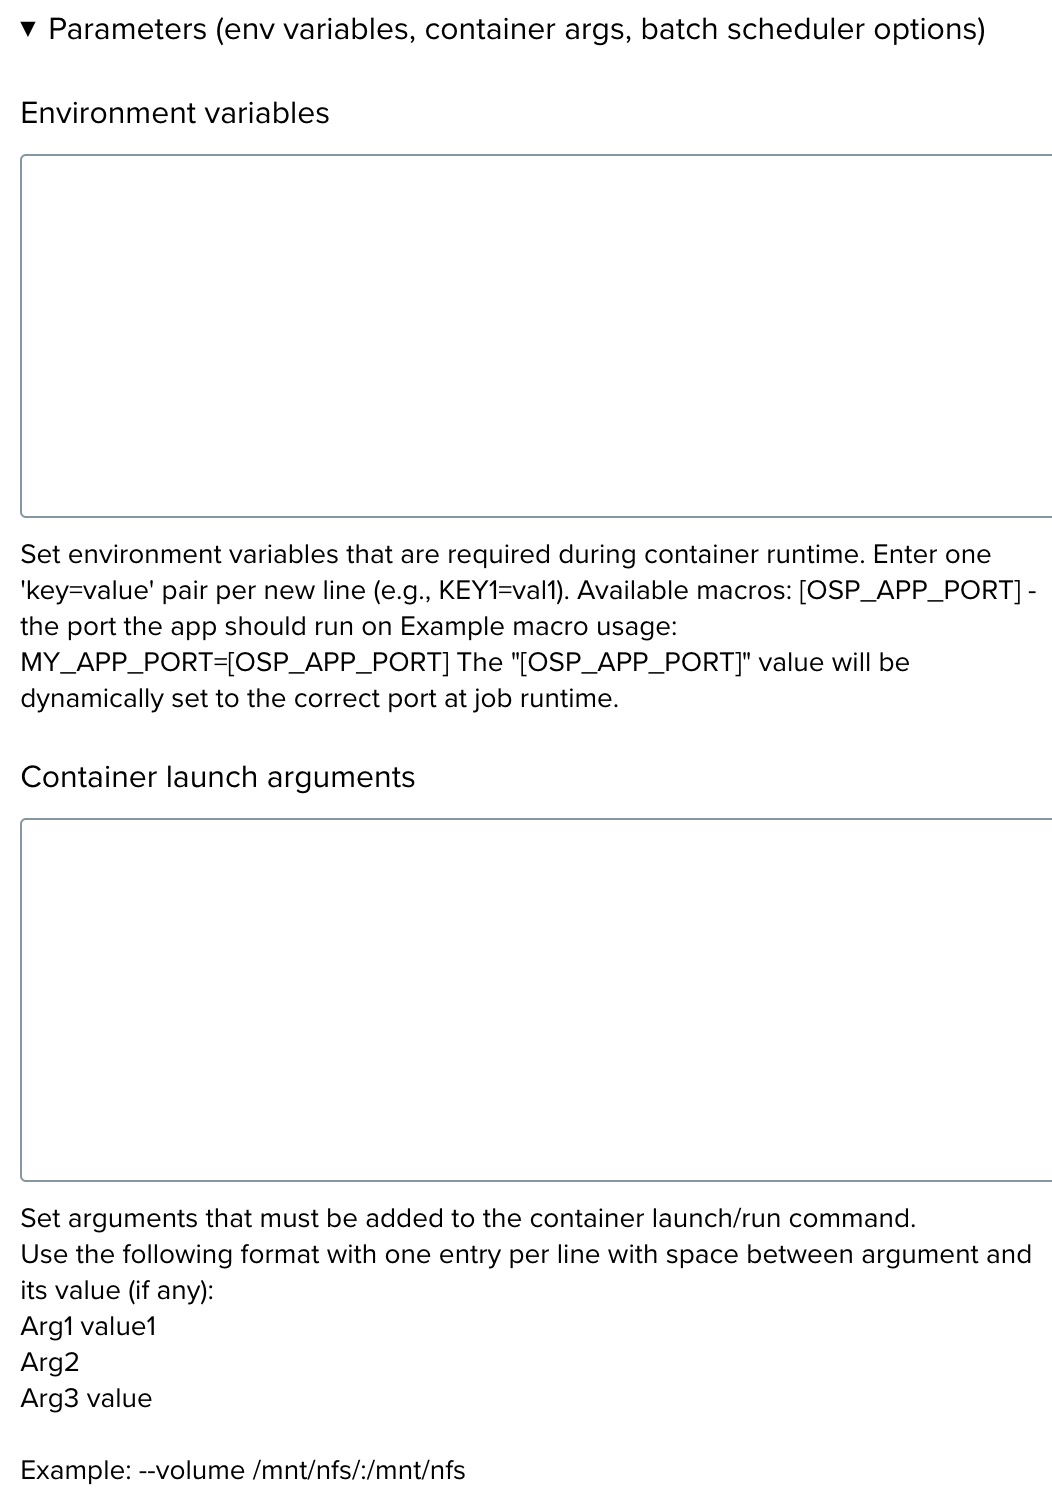
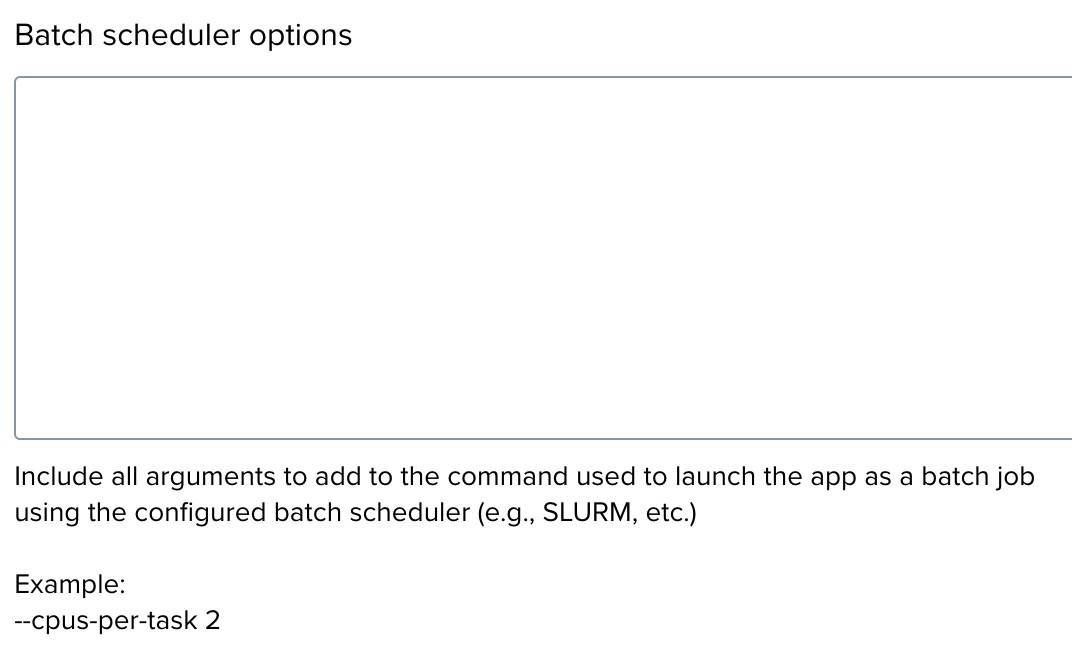
Step 12: Input parameters (environment variables, container args, scheduler)
In the Parameters section, you can specify various inputs required for the container:
- Environment variables — add environment variables one per line in
key=valueformat. For example:MY_APP_PORT=8080. - Container launch arguments — include arguments in the required format, with each argument and its value on a new line. For example:
--volume /mnt/nfs:/mnt/nfs. - Batch scheduler options — if your application uses a batch scheduler, include any specific options here. For example:
--cpus-per-task 2.
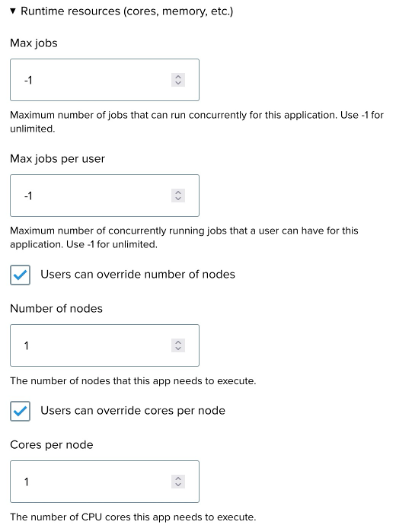
Step 13: Configure resource limits
- Max jobs — the maximum number of jobs that can run concurrently for this application.
- Max jobs per user — the maximum number of jobs one user can run simultaneously.
- Number of nodes — the number of nodes the application requires. If your app is parallelized, users can be allowed to override this value.
- Cores per node — the CPU cores per node assigned to this app. Users can be allowed to override.
- Memory — the memory required (example:
100 MB). Users can be allowed to override. - Max runtime — the maximum runtime in minutes (example:
10 minutes). Users can be allowed to override.

Step 14: Finalize and save
- Review all details to ensure correctness.
- Click Save to register the application.
Building input elements for the launch form
After creating an app, you configure its launch form — the interface users see when they click Launch. The launch form is built with a no-code webform builder: you add input elements, configure how each element maps to a command-line argument, and save.
This section walks through adding a text field element to an app's launch form. The example uses the Image Classification app and adds an input for the image URL.
Step 1: Application created
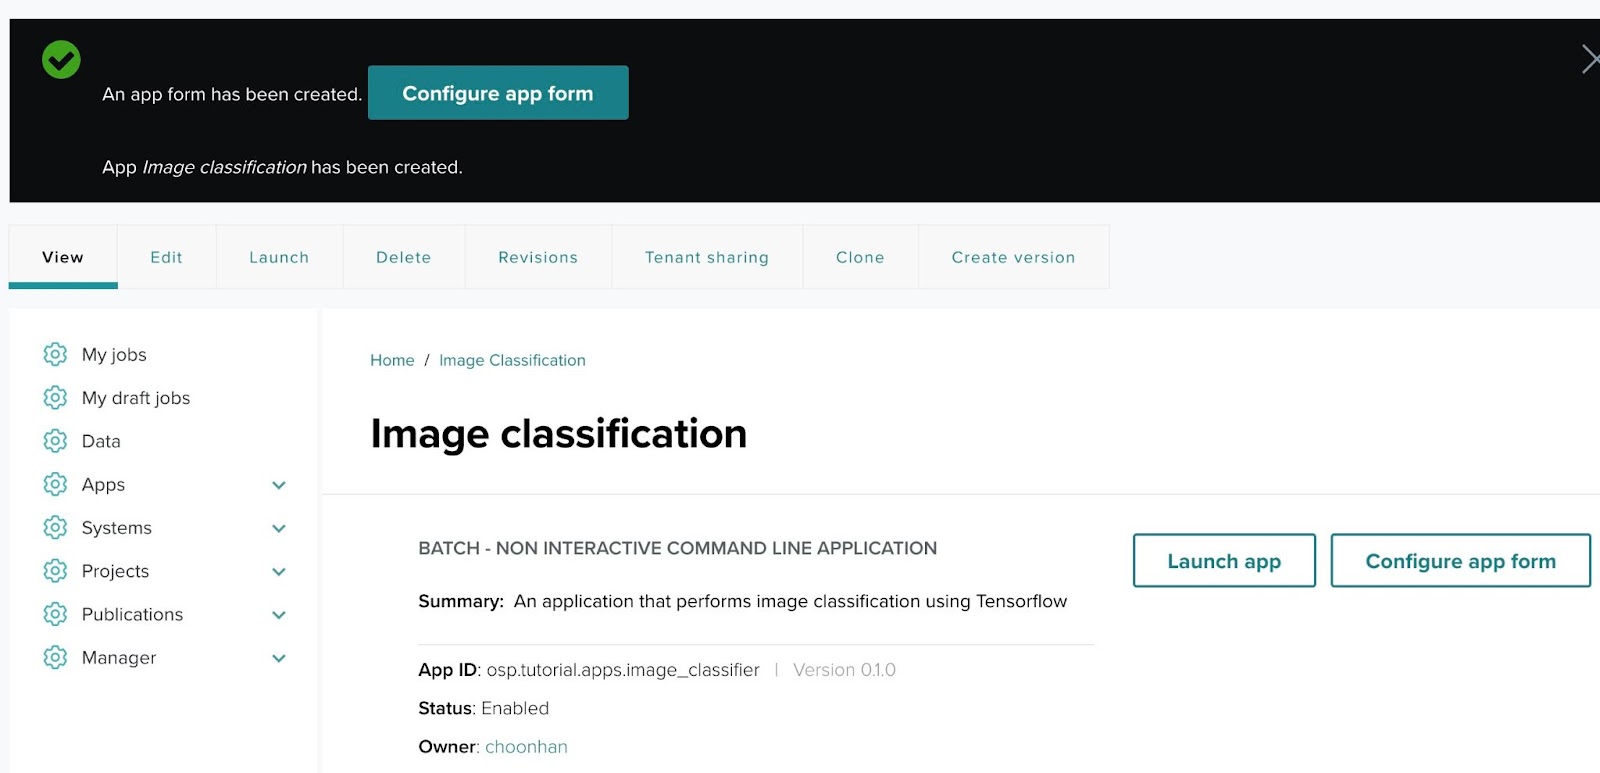
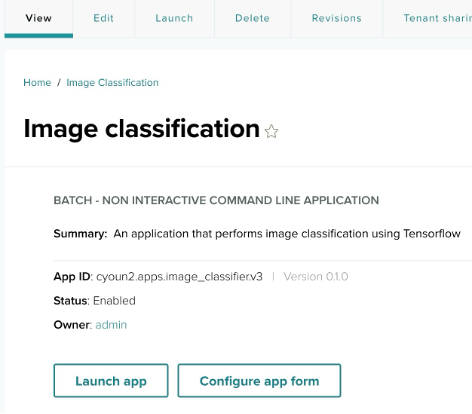
Once you have successfully created an application, you will see a confirmation message:
"An app form has been created. App Image classification has been created."
Click Configure app form to start setting up the custom input elements your app will require. The app will be configured to accept user inputs necessary for running the scientific application on a designated system (such as an HPC cluster or AWS).
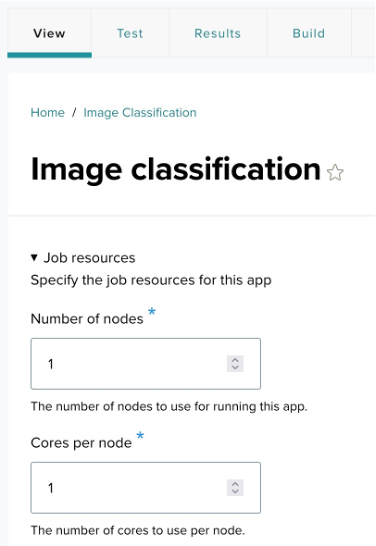
Step 2: Begin configuring the app form
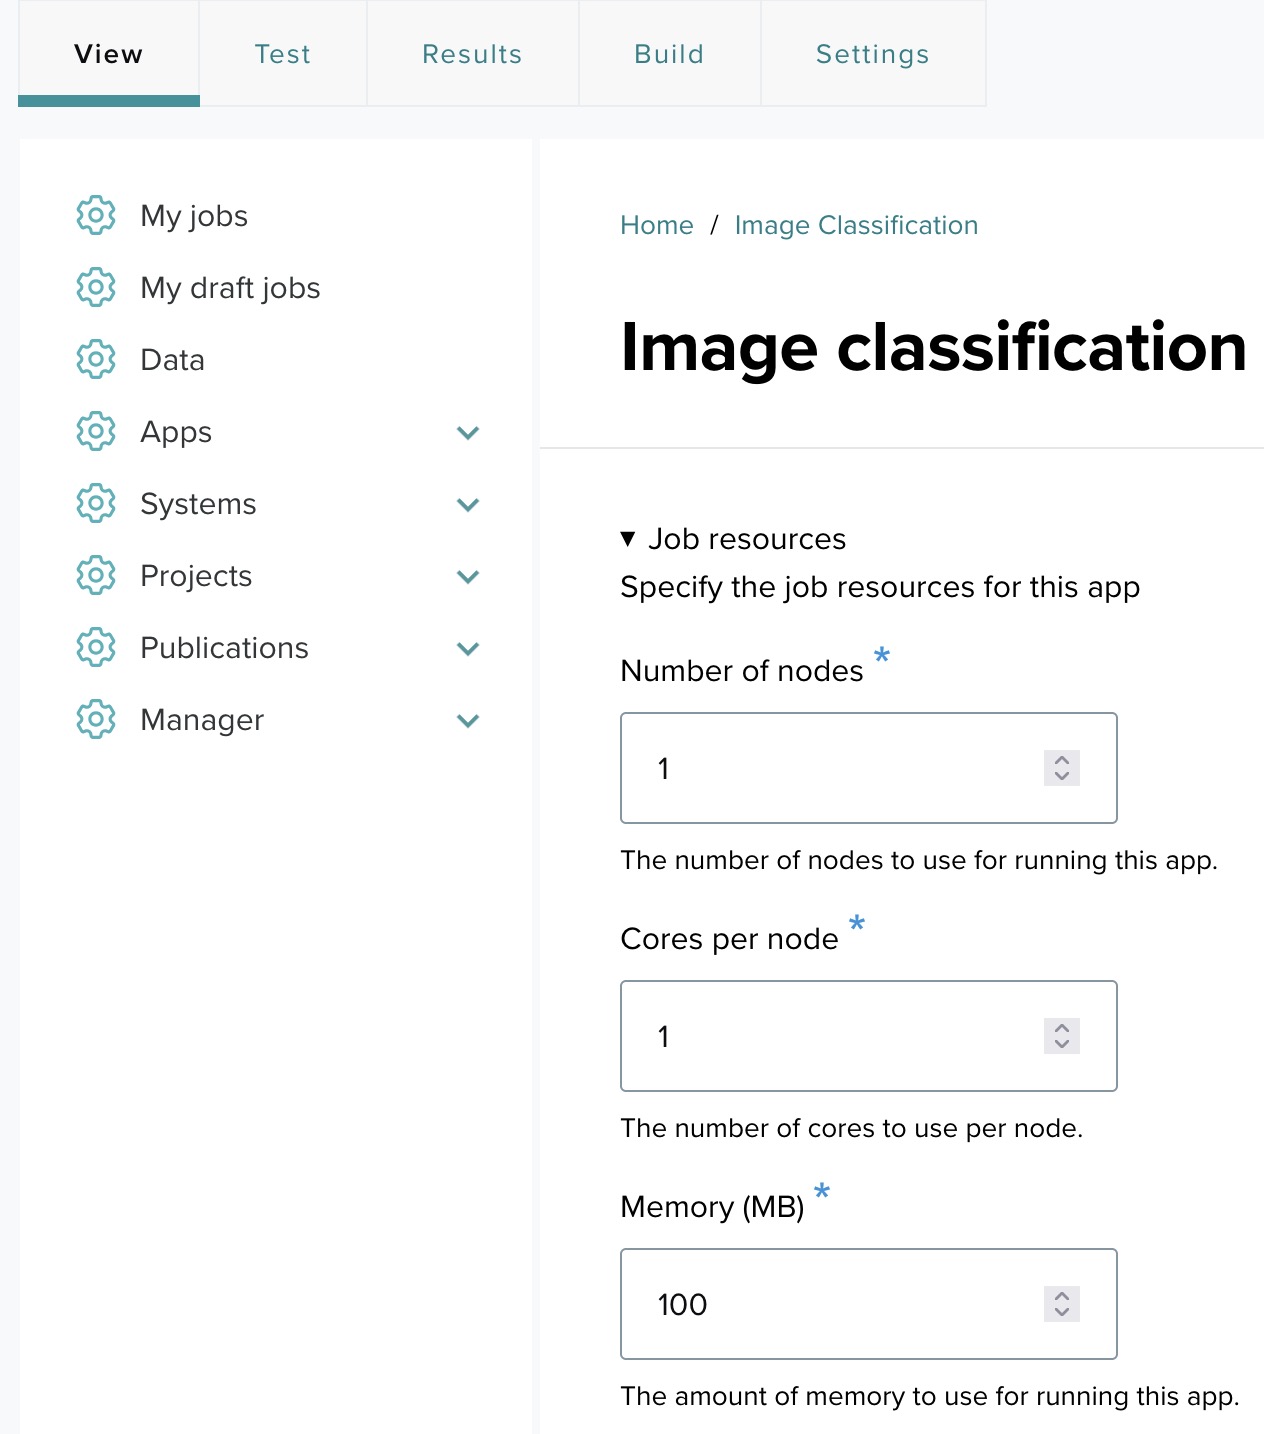
After clicking Configure app form, you are directed to a page where you can specify job resources and add input fields for your application.
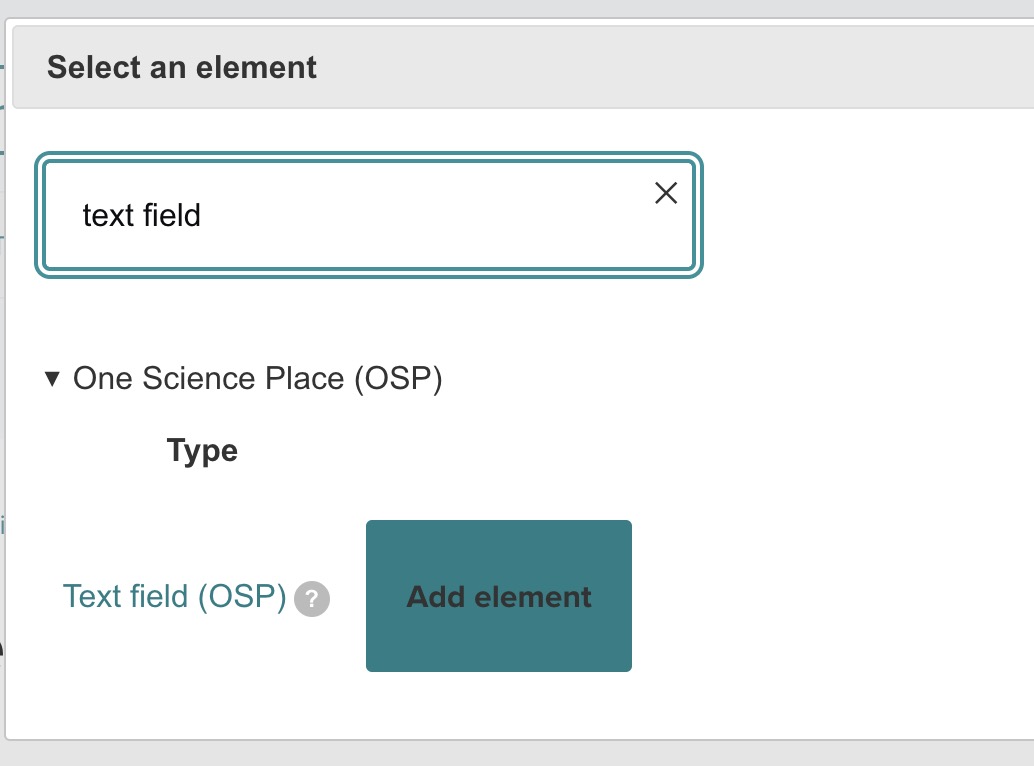
Step 3: Search for elements
After clicking the Build link, to add a custom input field — such as a URL for the image in this example — follow these steps:
- Click the Add element button on the top left.
- In the Select an element search box, type a keyword related to the input you need. For example, if you need a text field, search for "text field".
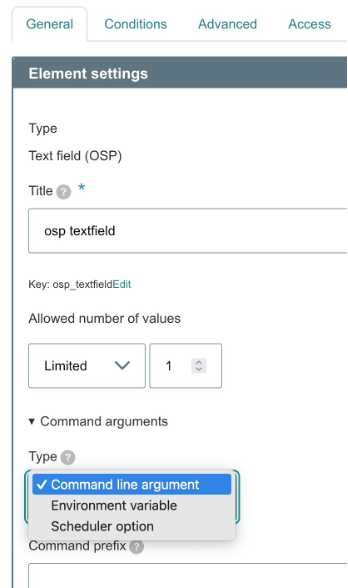
- From the list, choose the desired element. In this example, the Text field (OSP) element is chosen to capture the image URL.
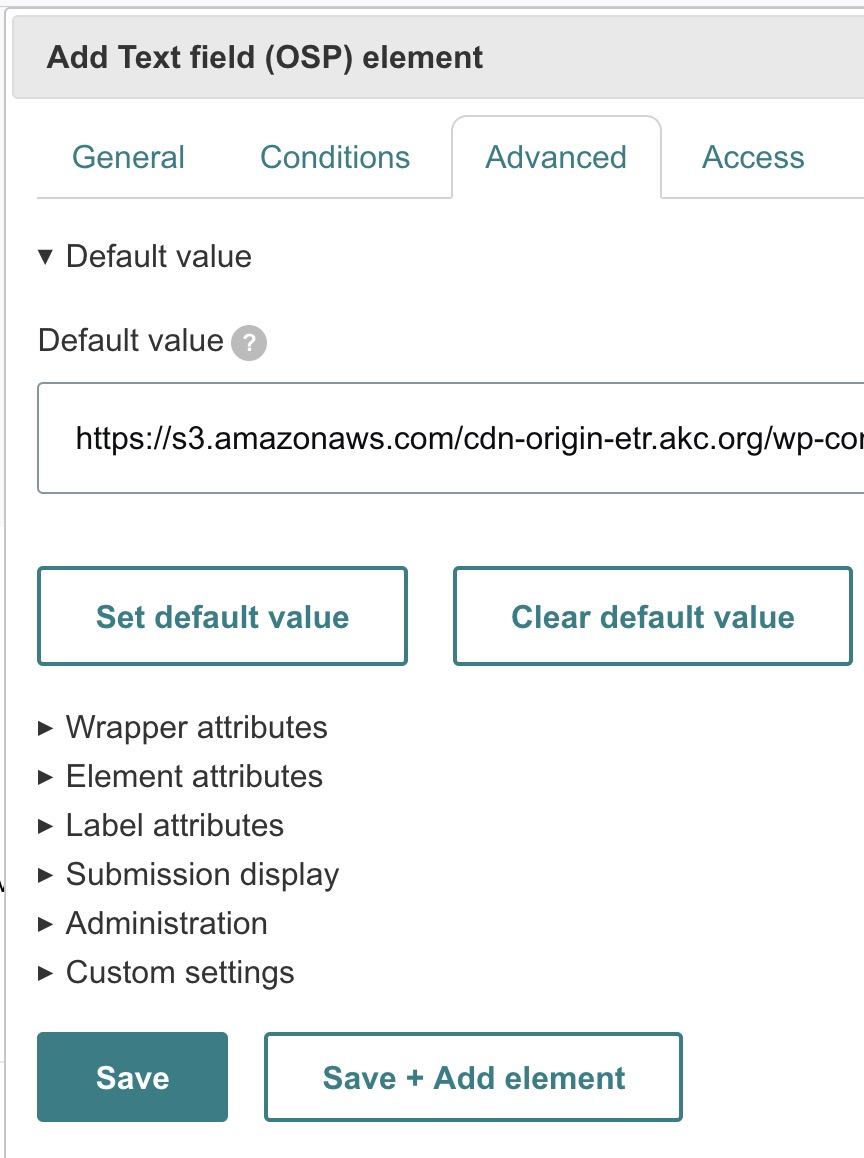
Step 4: Add and configure the text field
After selecting the text field element, configure it to match your application requirements:
- Title — the label shown to users (example:
image url). This is how users will know what to input. - Key — automatically generated based on the title (example:
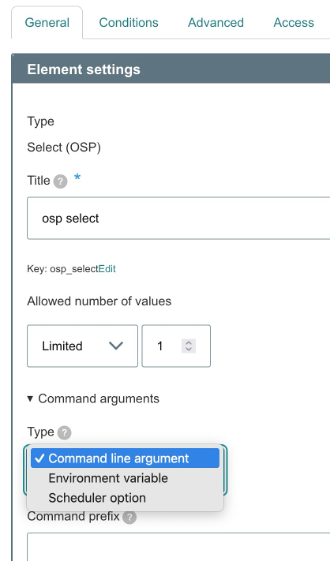
image_url). - Command arguments — defines how the input is passed to the backend:
- Type — select Command line argument.
- Command prefix — set the prefix, for example
--image_file=. - Ensure the Add trailing space to command prefix checkbox is unselected so the command is formatted correctly.
- Default value — you can provide a default value, such as a URL to an example image.
Once everything is configured, click Save to add this element to the form.

Step 5: Review added element
After saving, the newly added text field appears in the element list on the right side of the screen. This list shows all the input fields that will be included in the final application form. At this stage, you can continue adding more elements or adjust the current ones as needed.
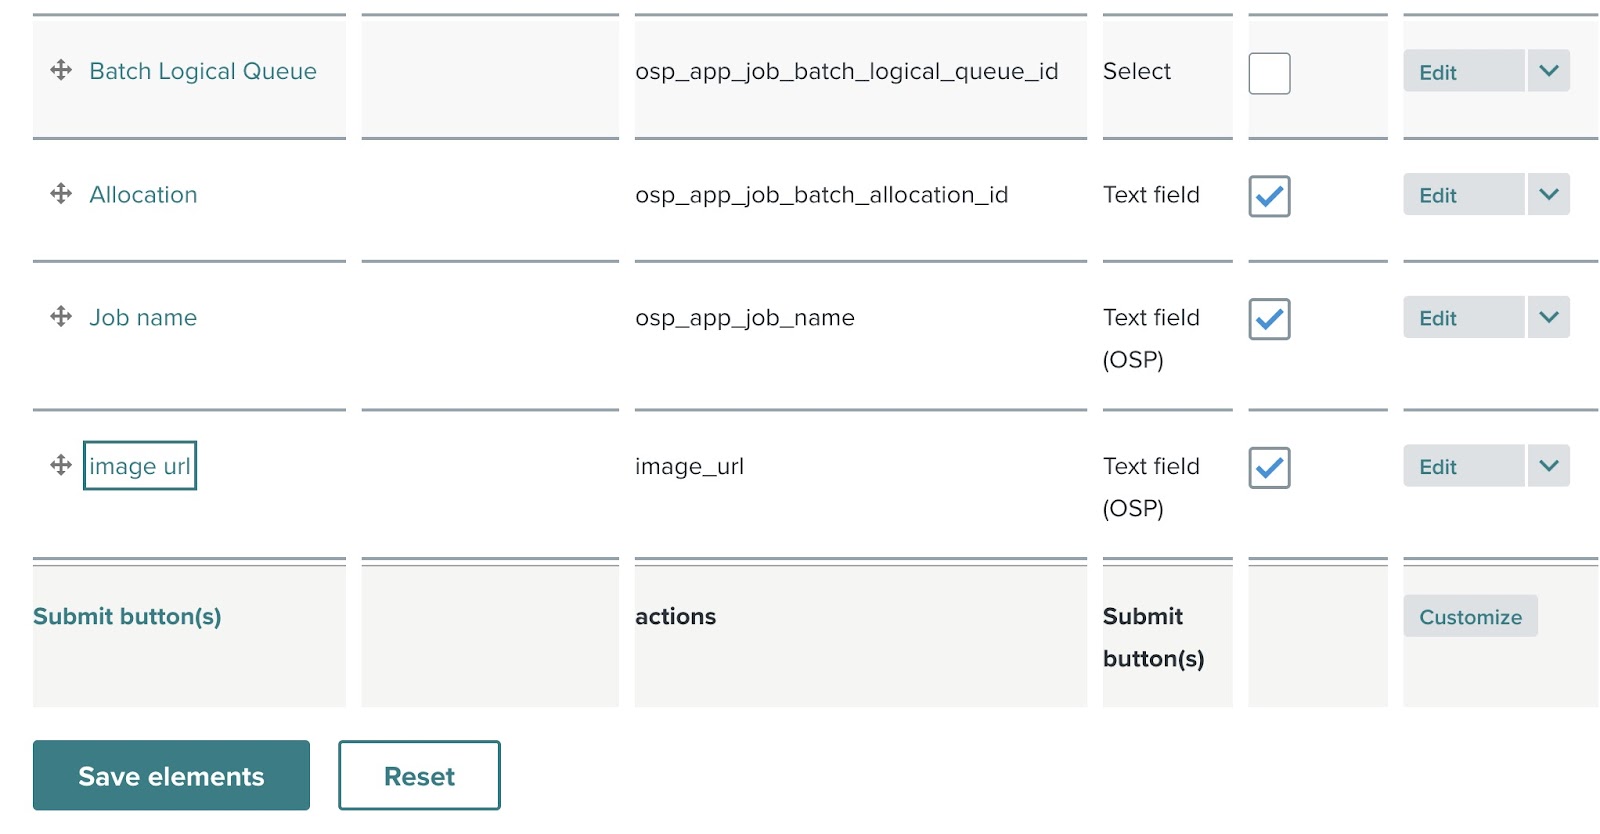
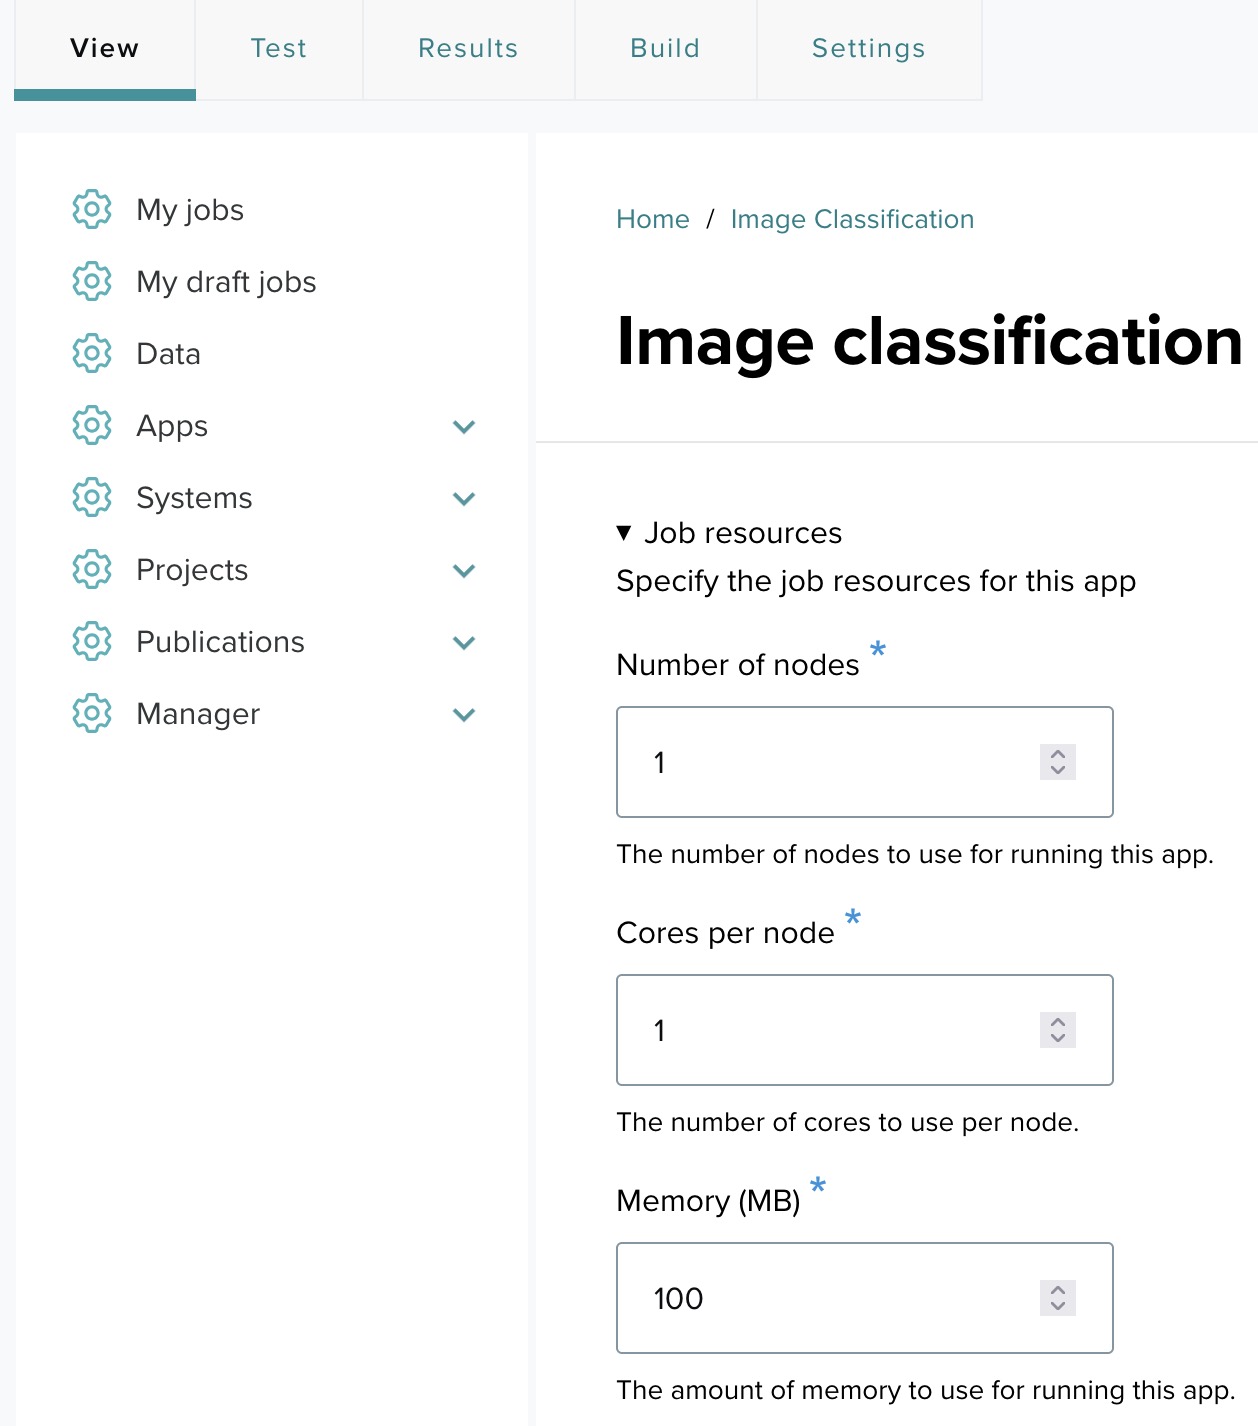
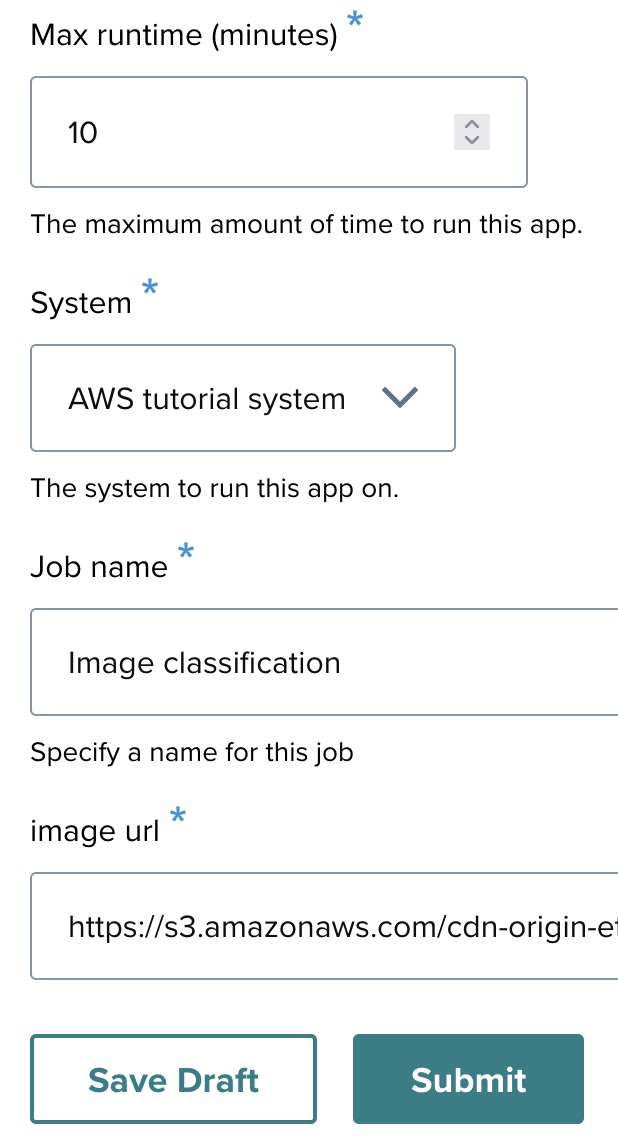
Step 6: The final app form
Once you've added all necessary input fields, the app form is complete. In this example, after adding the text field for the image URL, it is displayed in the form alongside other app settings.
You may update the following information as needed before submitting a test job:
- Number of nodes — how many nodes the application will use.
- Cores per node
- Memory (MB)
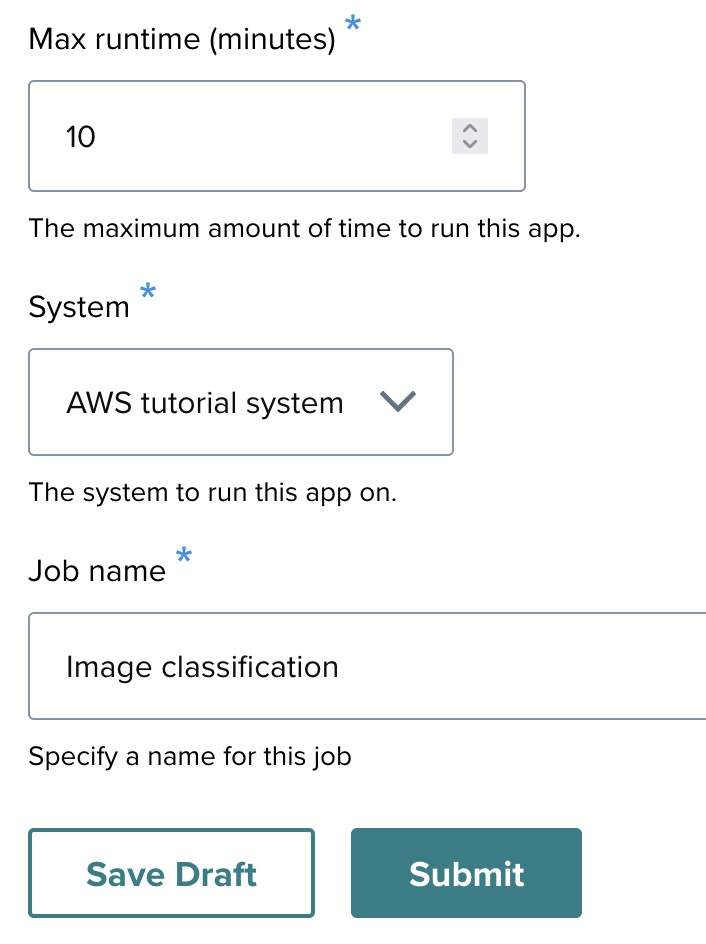
- Max runtime (minutes) — for example,
10. - System — the target system.
- Job name — a test run name.
- Image URL (for this example app).
Once you've filled in these details, click Submit to launch a test job.
UI webform elements reference
OneSciencePlace introduces UI webform elements specifically designed to handle complex input scenarios typical in scientific computing applications. These UI webform elements are built on top of Drupal Webform elements and offer advanced options to pass user inputs as command-line arguments, environment variables, or scheduler options. This flexibility makes UI webform elements highly useful for scientific applications that need to interact with command-line tools and job scheduling systems.
List of stock UI webform elements
There are seven stock UI webform elements, which build on the base Webform elements in Drupal and provide additional configurations tailored to pass data as commands or environment variables:
- Checkbox (OSP) — integrates command-line options with checkbox states, enabling conditional logic based on user selection.
- Computed Twig (OSP) — dynamically generated values using Twig templating, useful for on-the-fly calculations.
- File (OSP) — facilitates file uploads with direct integration into command-line arguments or environment variables.
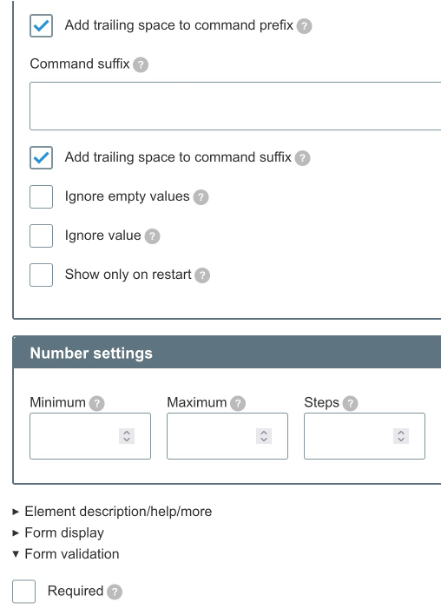
- Number (OSP) — allows numeric input with validation and direct command integration.
- Radios (OSP) — passes user-selected radio button options as part of command execution.
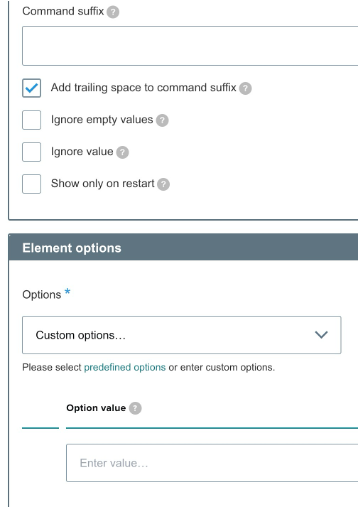
- Select (OSP) — dropdown selections are directly passed into the command line or scheduler.
- Text field (OSP) — passes user text inputs as arguments, allowing for custom command execution.
Each of these elements is optimized to integrate user inputs into command-line workflows, making OSP a powerful solution for scientific applications that require robust input handling and backend tool integration.
Common options for UI webform elements
All OSP elements share several advanced configuration fields to fine-tune how data is passed and processed:
Command type
Choose how the value is passed:
- Command-line argument — the element's information is directly incorporated into the command-line arguments.
- Environment variable — the information is passed to the command via an environment variable.
- Scheduler option — the element is integrated with a job scheduler.
This feature allows for better integration with command-line-based systems or job schedulers.
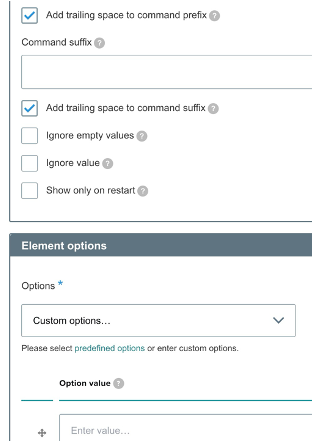
Command prefix/suffix
Add custom strings before or after the value for enhanced command structure (for example, --input-prefix=, --output-suffix).
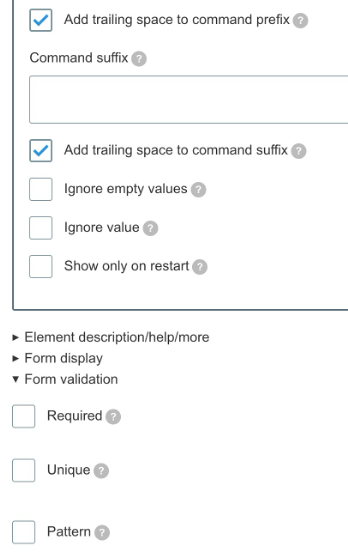
Add trailing space to prefix/suffix
Adds a space after the command prefix or suffix, ensuring commands are well-formed when concatenated.
Ignore value
Skip the element's value entirely and use only the prefix/suffix if needed.
Ignore empty values
Skip elements with empty values when building the command. This prevents null or unnecessary inputs from being passed to the command line.
Show only on restart
Useful for jobs that need certain fields only when restarting a task.
These configurations ensure input can be accurately passed to external systems or scripts in scientific workflows.
Examples of stock UI webform elements
The following subsections walk through each of the seven stock elements with a usage example.
1. Checkbox (OSP)
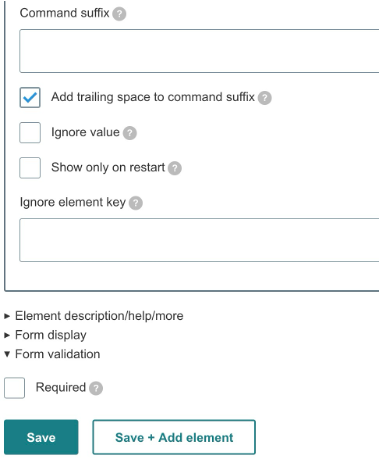
The OSP Checkbox allows the state (checked or unchecked) to influence command execution. For instance, if the checkbox is checked, you can enable specific arguments in the job configuration.
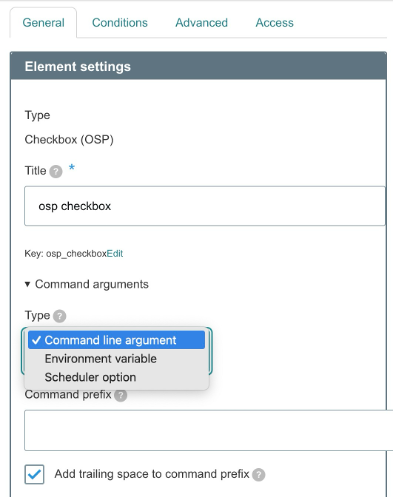
Additional OSP configuration options
- Ignore value — disregards the checkbox value (true or false) and prevents any prefix or suffix from being included when constructing the command.
- Ignore element key — if you specify the element key (for example,
osp_select_test), this option ignores the checkbox value and prevents any prefix or suffix from being included when generating the command.
Example usage
If the checkbox is meant to control file uploads, you can configure it to add a prefix of --enable-upload and a suffix of --path=/data when checked. The full command might look like:
run_data_analysis.sh --enable-upload --path=/dataIf unchecked, nothing is added to the command line.
2. File (OSP)
The OSP File element handles file uploads and can pass the file path or directory as part of the command-line arguments or environment variables.
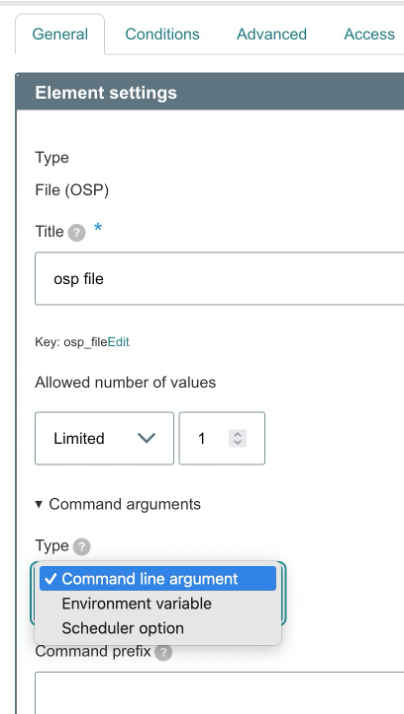
Additional OSP configuration options
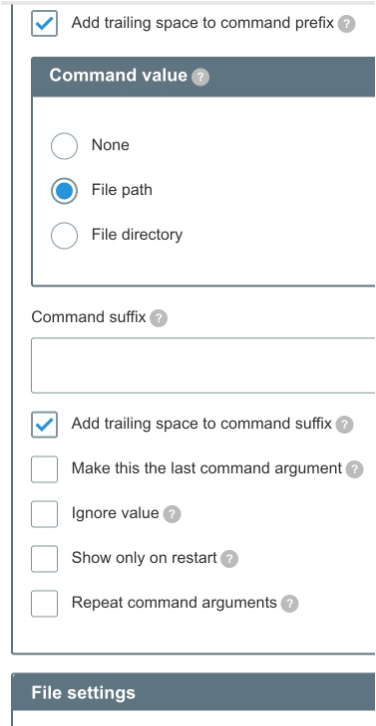
- Command Value — specifies what part of the file information is passed:
- File path — the full path to the uploaded file.
- File directory — the directory containing the uploaded files.
- None — neither path nor directory is included, but the file remains accessible in the designated input location.
- Make this the last command argument — ensures the file path or directory appears as the last argument in the final command. Useful for command-line tools that expect file input at the end of the command.
- Ignore value — prevents any prefix or suffix from being included when constructing the command.
Repeat command arguments — replicates the command arguments for scenarios involving multiple file uploads. For example, if multiple files are allowed and the prefix is
--input-file, the command could be:process_data.sh --input-file a.txt --input-file b.txt
Example usage
If a user uploads a file sample_data.csv and the element is configured with the prefix --file= to pass the file path, the resulting command looks like:
process_data.sh --file=sample_data.csv3. Select (OSP)
The OSP Select element extends the standard dropdown with command-line integration based on the selected option.
Example usage
If the user selects High Performance from a dropdown and the prefix is --mode=, the resulting command might be:
run_analysis.sh --mode=HighPerformance4. Text Field (OSP)
The OSP Text Field element passes user input directly into the command as a string.
Example usage
If the user inputs science into the text field and the prefix is --keyword=, the resulting command is:
run_analysis.sh --keyword=science5. Radio (OSP)
The OSP Radio element allows a single selection to be passed as a command option. Each radio button corresponds to a unique value passed into the backend system.

Example usage
If the user selects SDSC from a group of radio buttons and the prefix is --computing-center=, the resulting command is:
run_process.sh --computing-center=SDSC6. Number (OSP)
The OSP Number element allows the user to enter a numeric value that is passed as a command-line argument, environment variable, or scheduler option.

Useful configuration options
- Minimum/Maximum Value — defines the allowed range for the numeric input.
- Step — determines the increment by which the number can be adjusted. For example, a step of
1restricts users to whole numbers. - Default Value — predefines a number that is used unless the user changes it.
Example usage
If the user enters 8 in a field where the prefix is --cpus=:
run_process.sh --cpus=8If the suffix is GB and the user enters 16:
run_process.sh --memory=16GB7. Computed Twig (OSP)
The OSP Computed Twig element allows for advanced logic, where the value is not directly user input but is dynamically generated using Twig templates. This value can be passed to the backend as a command-line argument, environment variable, or scheduler option, based on conditions or calculations defined in Twig.

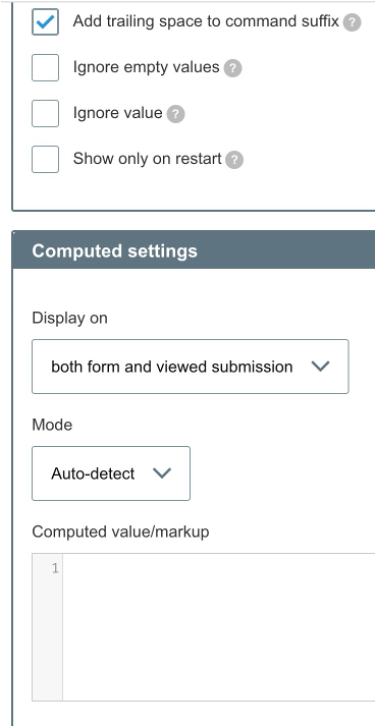
Useful configuration option
Twig expression — the most critical part of the Computed Twig element. The Twig expression is used to dynamically generate a value based on other form inputs, variables, or conditions. For example, using Twig to calculate a total or format a value before passing it to the command.
Example usage
Imagine you want to compute a total price based on the number of items a user selects in another form element and a constant price per item:
{% set price_per_item = 20 %}
{% set total = data.number_of_items * price_per_item %}
{{ total }}
This can then be passed to the command with a prefix like --total-price=. For 5 items at 20 units each:
checkout.sh --total-price=100Important considerations
- Twig knowledge — familiarity with Twig syntax and functions is essential for effectively using this element.
- Performance — complex computations or frequent updates can impact form performance, especially with AJAX enabled. Use caution and consider alternative approaches for resource-intensive operations.
Worked example: adding a webform element to an existing app
This worked example shows the end-to-end flow for adding a custom webform element to an existing app, using the Image Classification app as a reference.
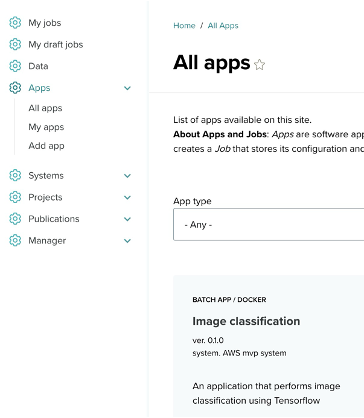
Step 1: Select the app
- Navigate to the Apps menu on the left sidebar.
- Under All apps, you will find a list of available applications.
- Locate the Image classification app and click on it to proceed.
Step 2: Configure the webform
After selecting the Image classification app, the app's summary page appears. Click Configure app form to begin editing the webform for job submission.
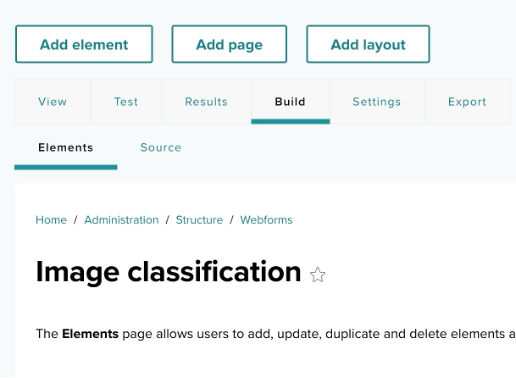
Step 3: Access the form builder
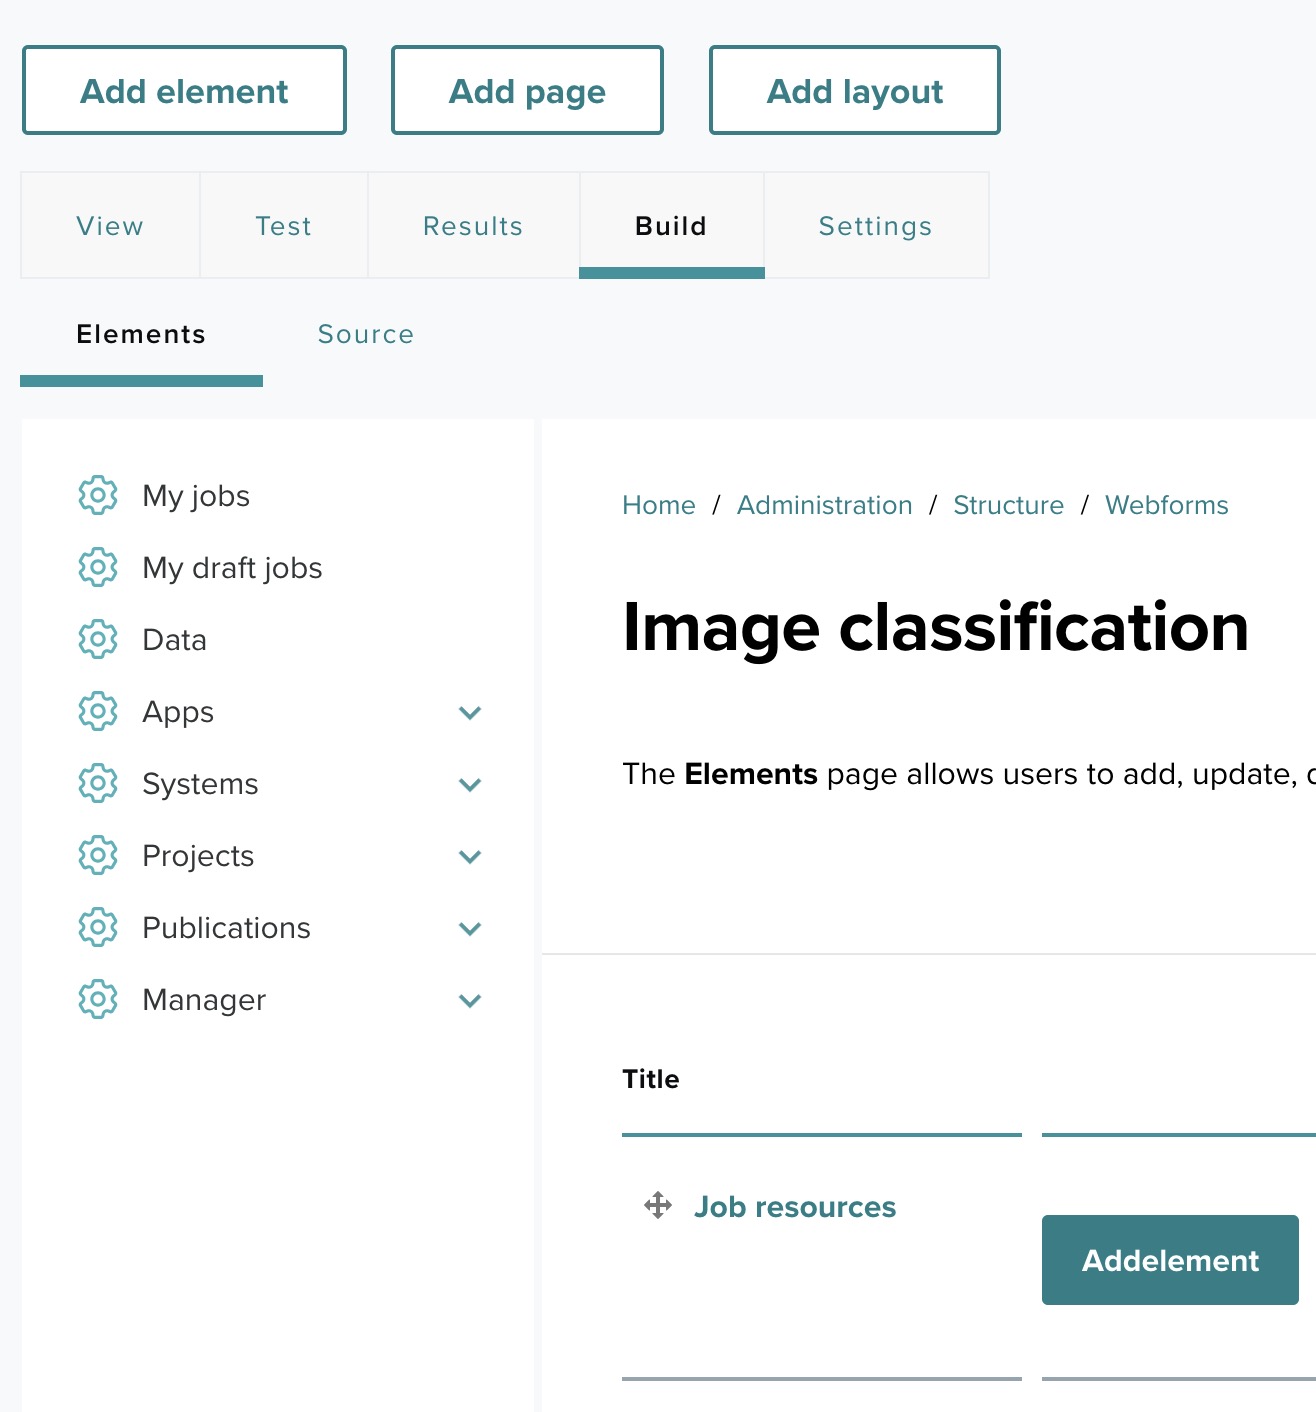
Once you click Configure app form, you are directed to the job page. On the job page, locate the Build link at the top and click it to access the form builder.
Step 4: Open the webform builder
After clicking the Build link, the form builder page opens. Here you can add, update, or delete webform elements. Click the Add element button at the top of the page to open the element selection window.
Step 5: Add a webform element
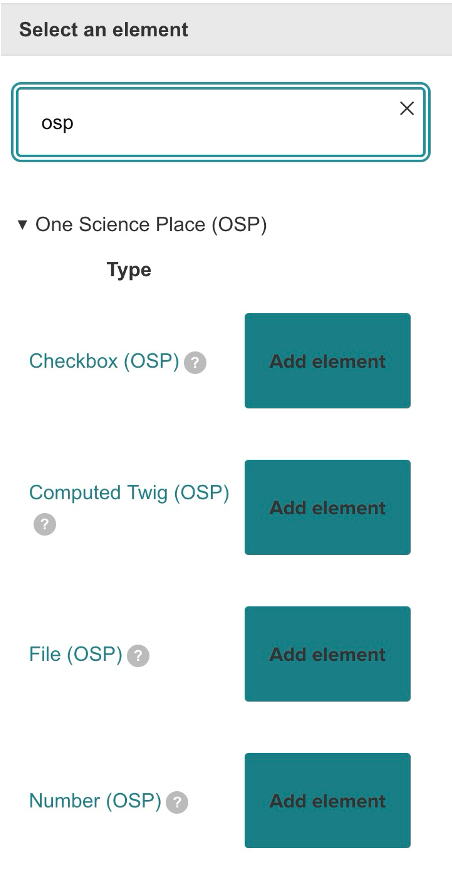
In the Select an element pop-up window, a list of webform elements appears. Type osp in the search bar to filter for the webform elements provided by the OneSciencePlace module. Choose the desired element by clicking the Add element button next to the element's name.
Summary
The OSP extended Webform elements provide a highly configurable, powerful way to handle inputs in scientific workflows. By allowing data to be passed as command-line arguments, environment variables, or scheduler options, OSP enables seamless integration with backend command-line tools and job schedulers. This flexibility simplifies complex workflows and enhances the usability of scientific applications built on Drupal Webforms.
For complete end-to-end examples of app creation, see the App Contributor Tutorials.
Previous: ← End User Guide | Next: App Contributor Tutorials →